Process time series data with maximum efficiency
Process time series data with maximum efficiency
In industrial environments, large amounts of data accumulate from various sources (e.g. sensor data) that must be linked with a time stamp for further processing (time series data). A solution such as InfluxDB Cloud is ideal for this purpose.
InfluxDB Cloud is a high-performance and automatically scaling platform for the storage and (real-time) visualization of time series data. The cloud-based database solution features high efficiency in ingesting, compressing and querying data.
With the OPC Router, you are able to feed data from any source in your company into the cloud database in a targeted and automated way. Learn how this works in the following step-by-step tutorial on how to connect to InfluxDB Cloud via an API.

More information about InfluxDB Cloud and InfluxDB 3.0
More information about InfluxDB Cloud and InfluxDB 3.0
With InfluxDB Cloud, the powerful infrastructure of the InfluxDB time series database is now also available in the cloud. InfluxDB is developed by the company InfluxData and is widely used in the industry due to its efficiency in ingesting, storing and querying data. InfluxDB Cloud is based on the new InfluxDB 3.0 release, which further increases the processing capabilities of the platform.
Step-by-Step Tutorial – InfluxDB Cloud Connection with the OPC Router
The following step-by-step tutorial is divided into two parts:
Try out the InfluxDB Cloud connection with the OPC Router
Test the OPC Router now – free of charge and without obligations.
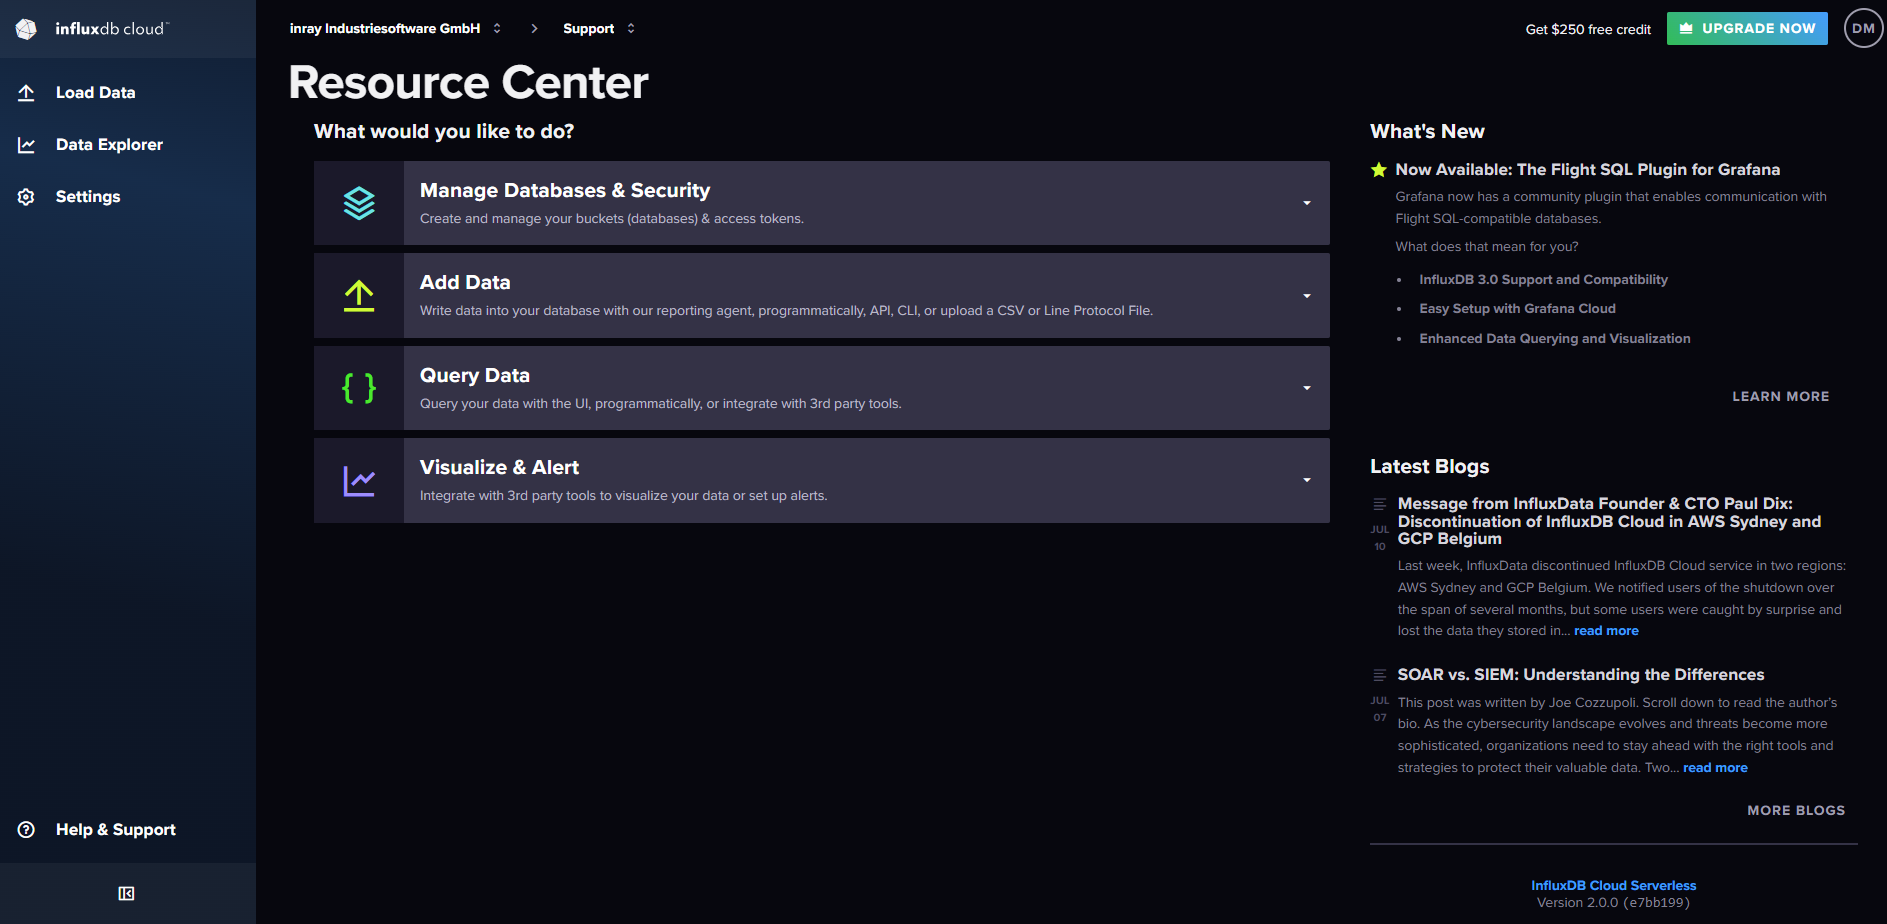
Configure the API access within InfluxDB Cloud
1. Login to InfluxDB Cloud.
2. Copy the browser URL from InfluxDB Cloud. It will be needed in a later step. The URL might look like this:
https://eu-central-1-1.aws.cloud2.influxdata.com/orgs/e41be2f7ad13ef96
3. On the left sidebar menu, click on „Load Data“ (1) and select „API Tokens“ (2). Click on the button „Generate API Token“ (3) and enter a description for the token.
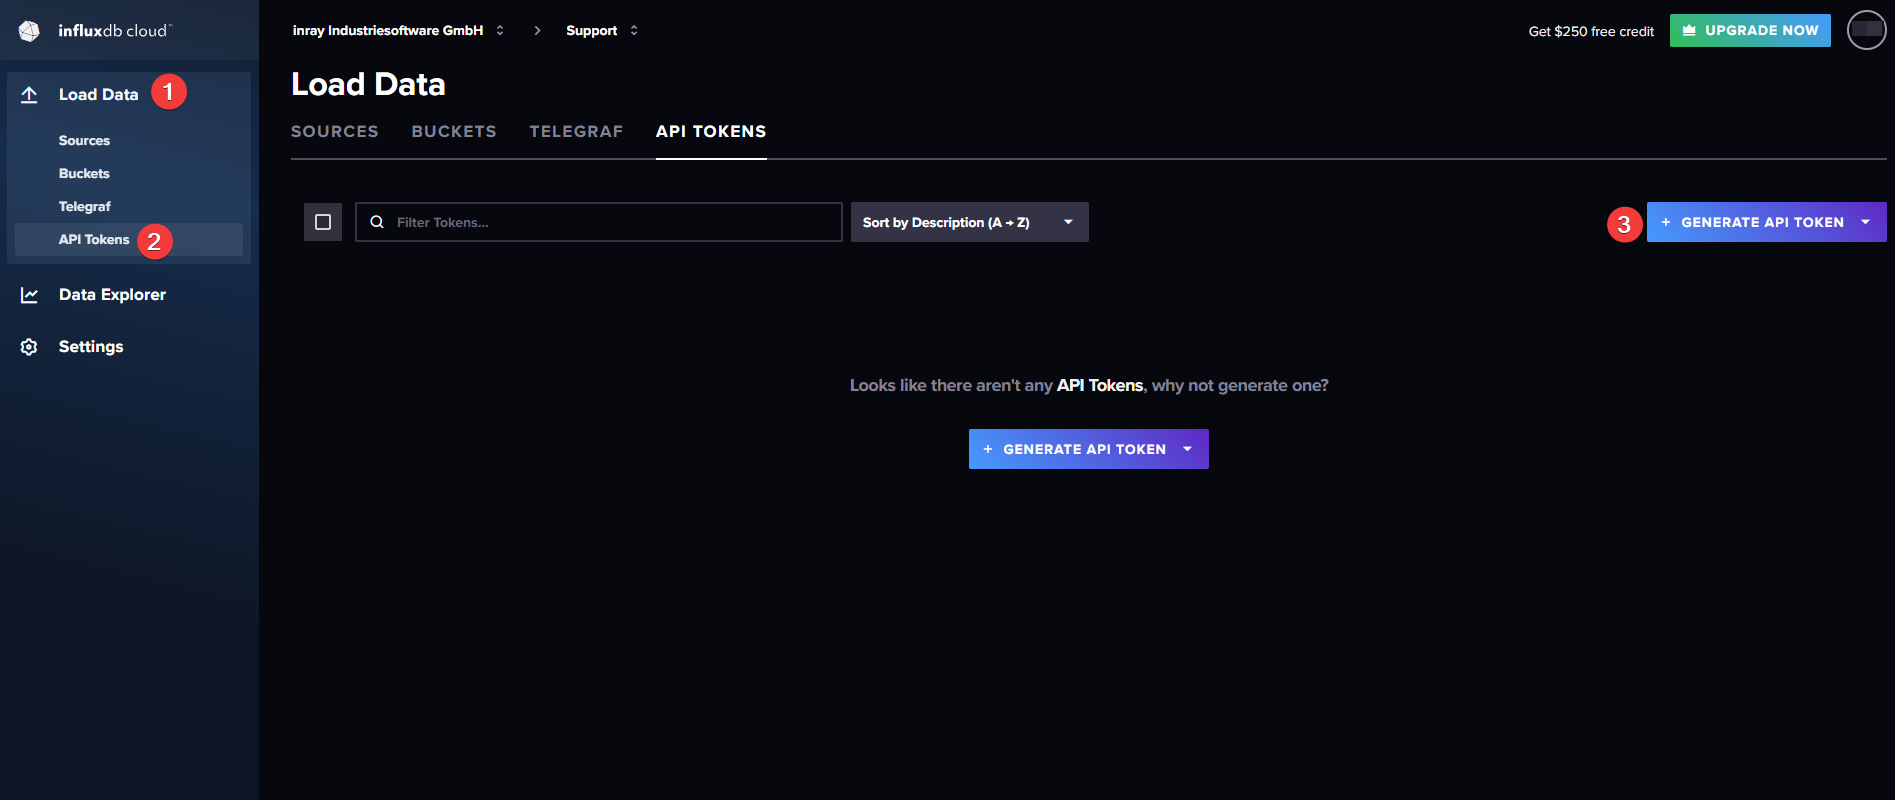
4. Copy the displayed API-Token. Make sure you save it because you won’t be able to access it at a later point.
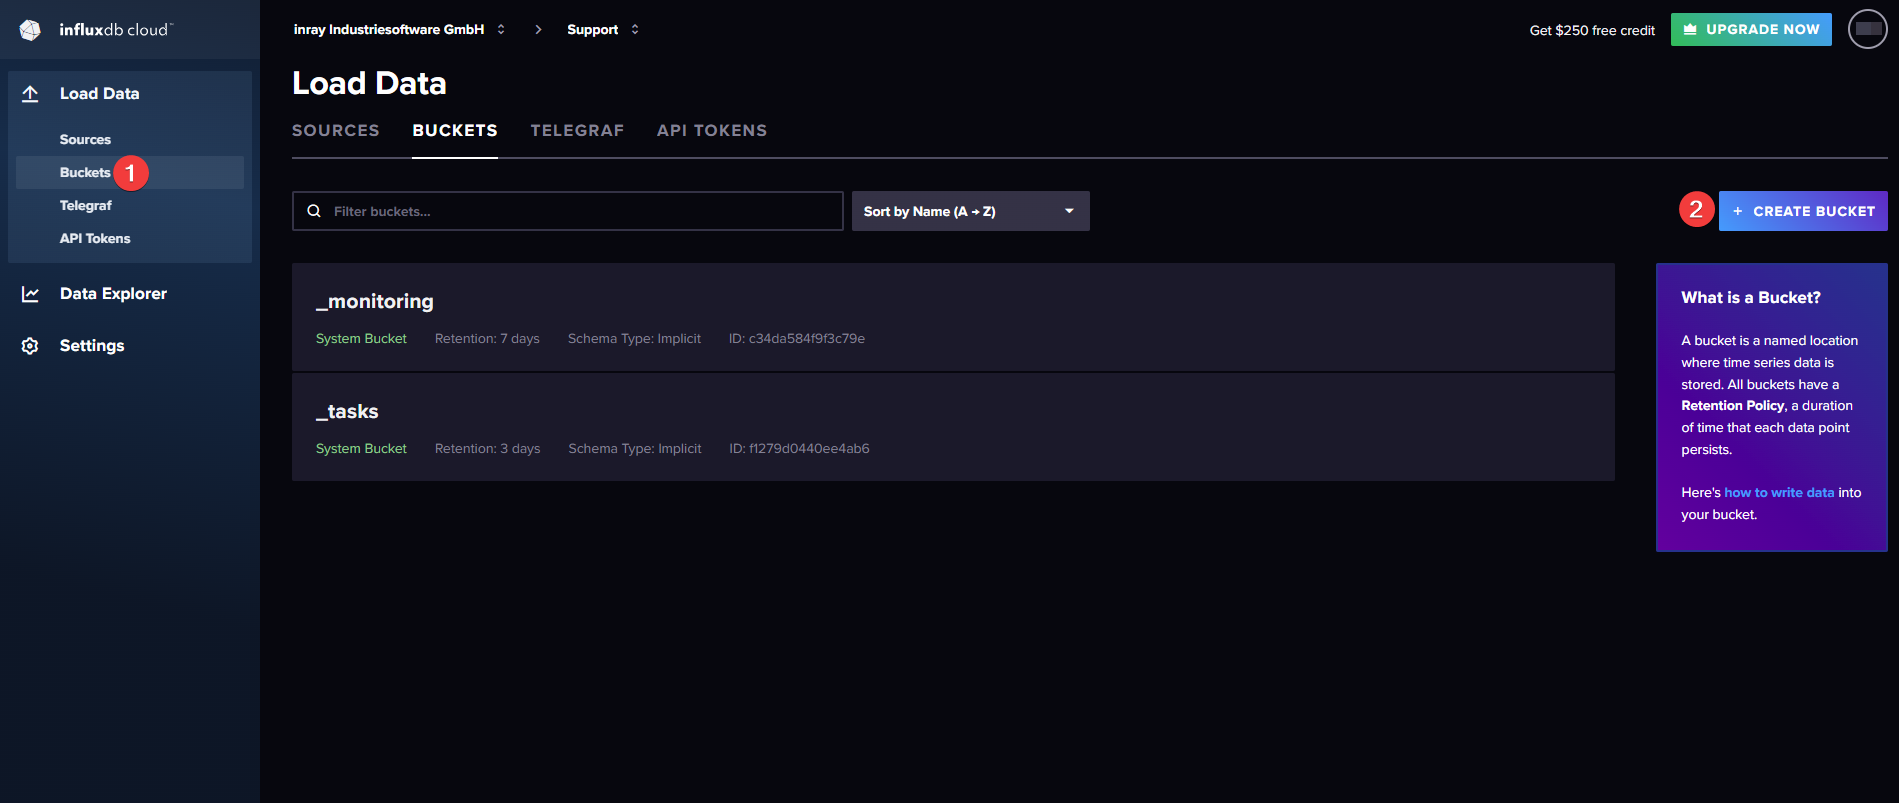
5. Under „Load Data“ in the left menu bar, select „Buckets“ (1) and create a new Bucket by clicking on the „Create Bucket“ button (2). The name of the new Bucket will also be needed in a later step.
Configure the data transfer in the OPC Router
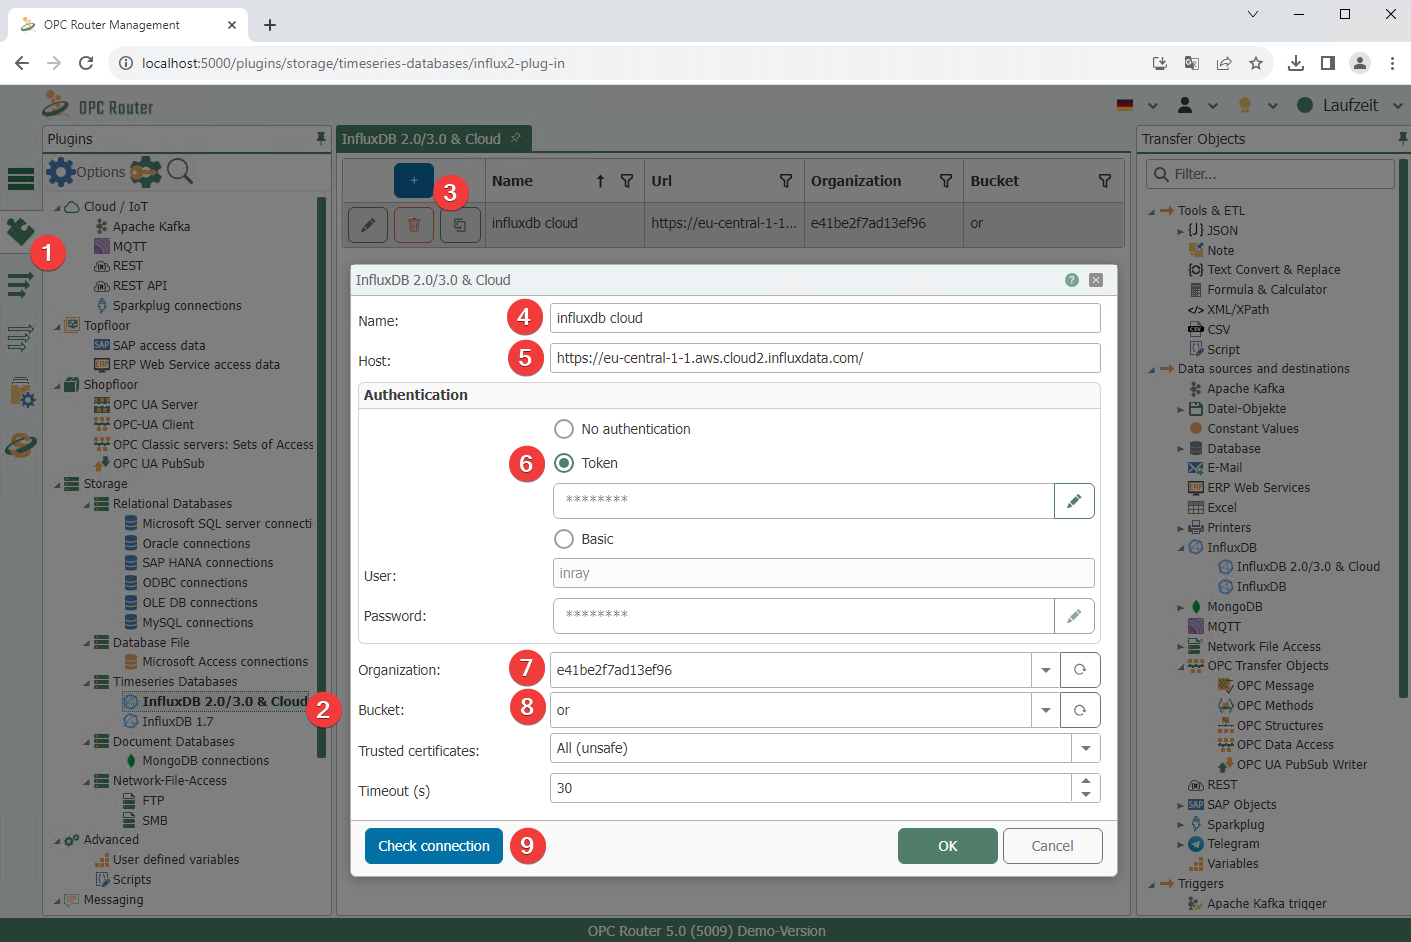
In order to transfer data to InfluxDB Cloud we will use the OPC Router’s „InfluxDB 2.0/3.0 & Cloud“ Plug-in. To complete the following steps you will need the API Token you copied previously as well as the browser URL shown in InfluxDB Cloud.
API Token and Browser URL should look similar to this:
URL: https://eu-central-1-1.aws.cloud2.influxdata.com/orgs/e41be2f7ad13ef96
API Token: PUKxM3EkwgpmTkWsXxbp_7Lxk1vaFp3NU43HNEzUP6WZ7rdQ48AEqJ19i-ZzFTKf_IshknvI1fYnkdeQKS2deg==
Click on the Plug-in symbol at the top of the left sidebar (1) and select the Plug-in „InfluxDB 2.0/3.0 & Cloud“. Click on the plus symbol to add the Plug-in (3) and fill in the fields as described below:
(4) A name of your choice
(5) The first part of the copied browser URL, in this example: https://eu-central-1-1.aws.cloud2.influxdata.com
(6) The copied API Token
(7) The last part of the copied browser URL (after /orgs/), in this example: e41be2f7ad13ef96
(8) The name of the Bucket you created
Click on the „Check connection“ button to confirm your configurations.
2. Drag and drop an InfluxDB 2.0/3.0 & Cloud Transfer Object into the middle area.
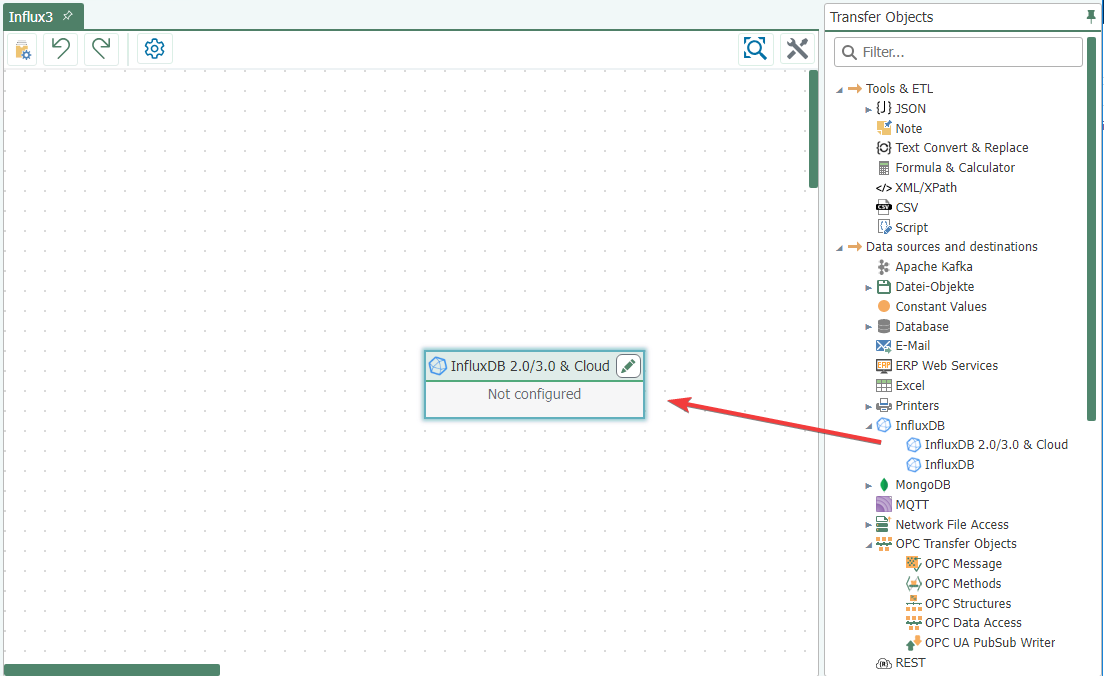
3. Doube-click on the newly created Transfer Object to open the configuration window.
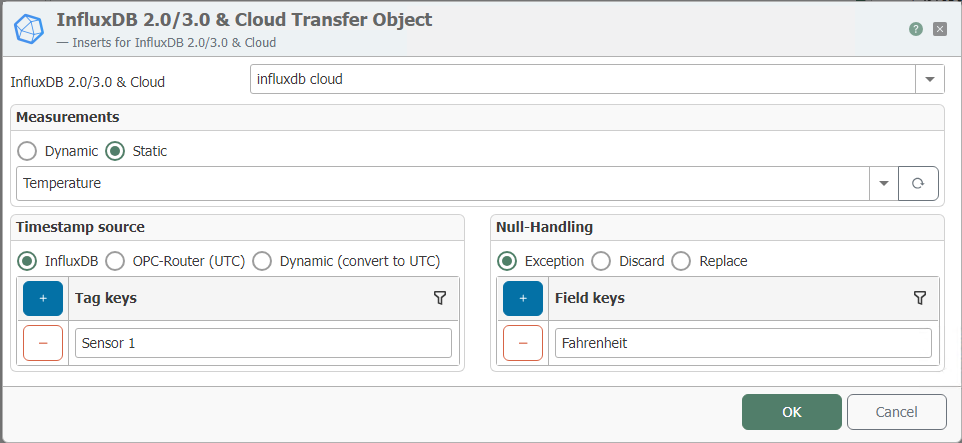
At the very top, select the name of the previously configured InfluxDB 2.0/3.0 & Cloud Plug-in.
Define a measurement series. Specify the Field Keys (fields in which the values are to be written) and the Tag Keys that are to be assigned to the written values (serve as filters in InfluxDB Cloud).
4. Connect the Transfer Object to your data source(s) of choice. Use the Transfer Object „Constants“ to designate the tags for your data. An example of a data source could be an OPC Server. In this case, you would use the Transfer Object „OPC Data Access“. The following screenshot shows a simple example configuration.
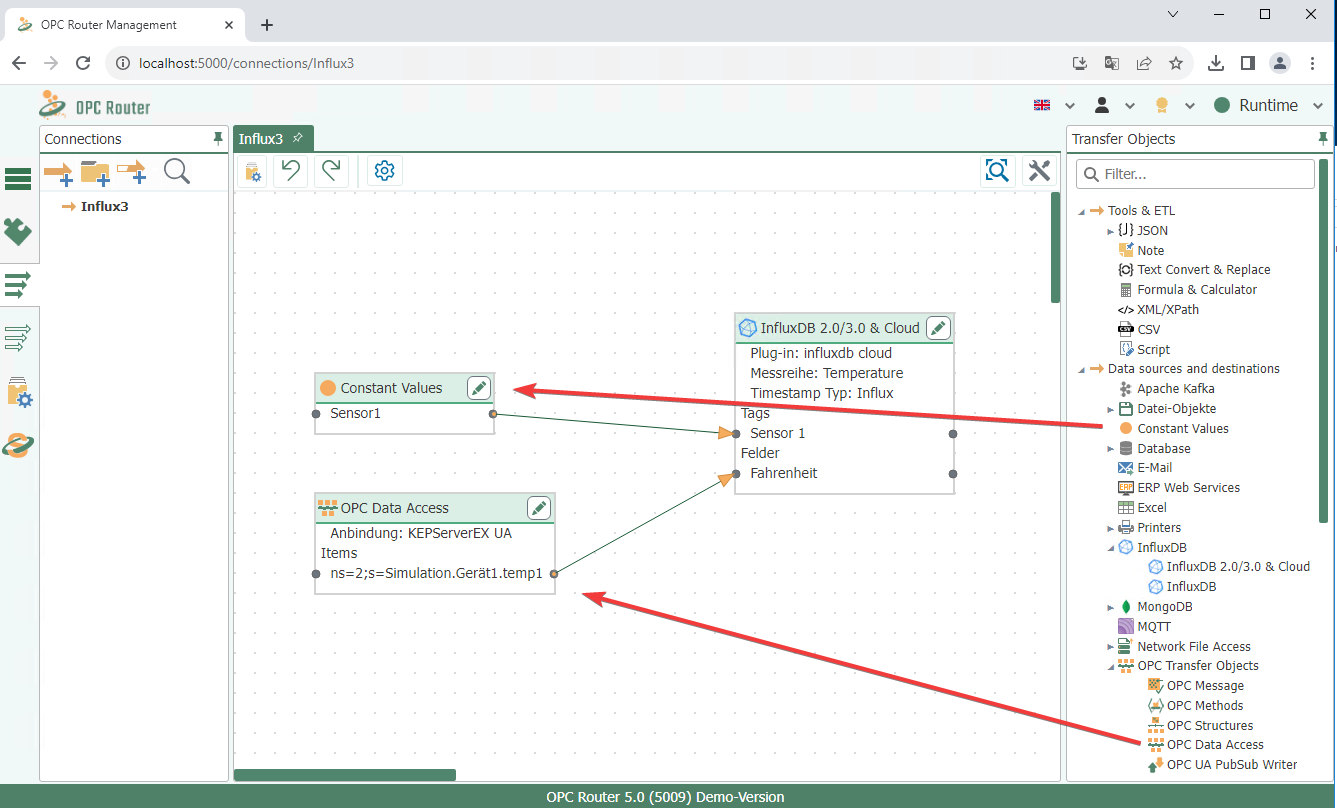
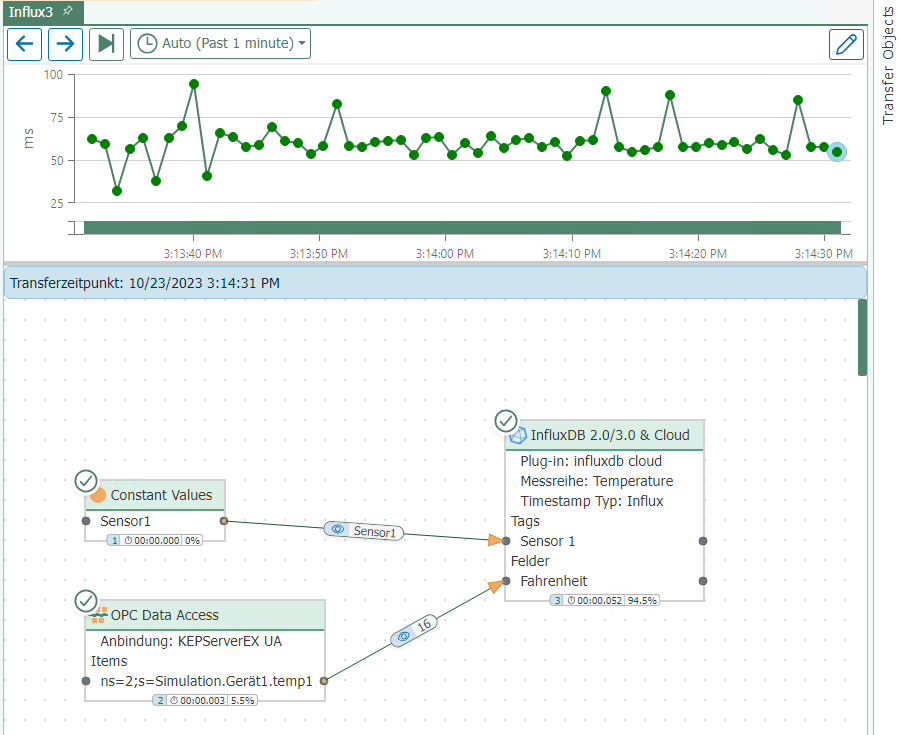
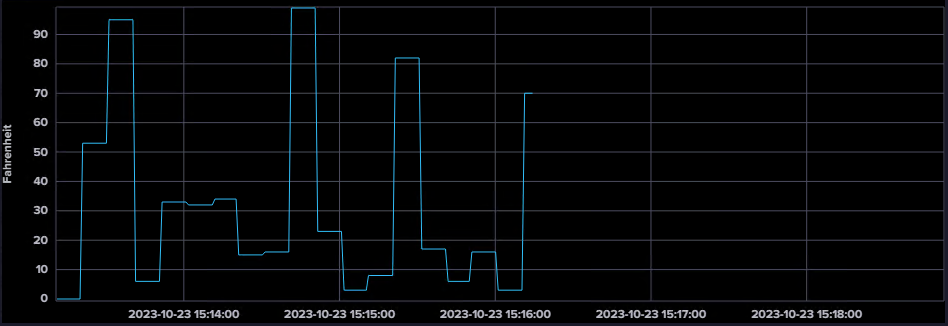
The following screenshots show an example of an InfluxDB Cloud connection within the OPC Router as well as a data visualization in InfluxDB Cloud.
More information
Find other exciting topics here:
The OPC Router enables a smooth and secure communication via REST. With the help of its REST Plug-in, the OPC Router is not only able to address other systems through their REST API but can also be used to implement a REST API for a connected system using REST triggers. For more information about the implementation and use of REST technology in an industrial environment, please refer to our page about the REST Plug-in.

Using a REST API, web services, devices and other systems can be addressed specifically and data can be transferred securely. In our linked article, we show five use cases for the REST standard in industrial environments.
The OPC Router is a software that networks your machines and systems. It enables the connection of all existing systems and can modernize processes sustainably. Our video explains exactly how the OPC Router works, how it can be integrated into your system environment and what advantages it offers your company.